
How to Create Reusable Blocks and Templates
Technical Blather
How to Create Reusable Blocks and Templates
Reusable Blocks and Templates are making website building faster. WordPress is outdoing themselves when it comes to adding new blocks with every update.
Learning how to implement them will make your blog post creation and page creation easier.
But First!
Recently, I updated my old posts from the classic look to the new blocks look. Let me tell you… that was a lot of work. It wasn’t too difficult and I highly recommend doing so. It’s one of those things you can do when there’s nothing else going on that requires immediate attention.
Quickie Tip:
If you, like me, used inline styles when writing old posts (meaning picking the heading colors using the color picker) then many of your posts may not match your current branding colors.
Edit an old post. Don’t automatically click the convert to blocks button. Instead, remove the images (after opening them in a new tab so you know their file names), then select all the text [Ctrl+A] and click the button that looks like an eraser in the extended classic toolbar. This removes those stingy inline styles.
If you do click the Convert to Blocks button, you’ll have to remove the html from those blocks. You can do this by clicking the three-dot menu, choosing Edit as HTML and then remove the span color=”#123456″ and /span items. Then click Edit Visually. If you broke the block, you should be able to undo to fix it and try again. For those who don’t understand hex codes, the #123456 is simply an example as it will most likely be a combination of letters and numbers.
Before you close this post to go start cleaning up old content, let’s make reusable blocks first. You’ll thank me later.
Reusable Blocks
Create a new post or page. It doesn’t matter which. We’re going to store the reusable blocks here. I named mine *** Reusable Blocks *** so it would stand out from other posts. I simply search *** and it pops right up. It’s also a private page. Yes, you can keep all of your reusable blocks in one place. Don’t be afraid to edit them until you get them right for your needs.
Once you enter the title and change Public to Private under the post settings, it’ll publish. If it closed, go back into it.
Insight:
What you can use Reusable Blocks for: Badges for Memes, About the Author Bio blocks for sites with multiple authors, Tip Jars through Ko-Fi, Buy Me A Coffee, CashApp, or Venmo. You can even create them for post types. If you know you’ll always have a certain number of images, headings, and paragraphs, you could easily create a post template to pop in, ungroup, then paste all the text you wrote in your preferred software to their appropriate spots. But first… let’s learn how.
Pick A Block Type
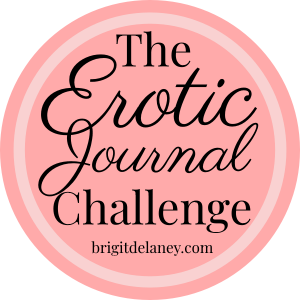
What do you need often on your posts? My Venmo tip jar is a reusable block, as are my Badges for Erotic Journal Challenge, Masturbation Monday, Wicked Wednesday, TMI Tuesday, ELust, and the Want More Sizzling Nibbles link.
IF I HAVE ANY INKLING I’LL USE SOMETHING THREE TIMES, I’LL MAKE A REUSABLE BLOCK.
If there is a badge involved, you want that image saved in your media gallery. It’s easier (and less strain on someone else’s bandwidth) when you save it.
First Method:
You can use the Media & Text block and have it side by side. Size does matter here. While the image will be resized and stacked to suit mobile phones, you also don’t want it gigantic on the regular screen.
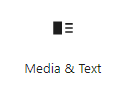
If the Media & Text icon doesn’t pop up when you type the / then you’ll want to click the + in the top left of your WordPress bar (desktop) and look for it there. You can also type med after the / and it should pop right up.
It’ll be two columns. You can choose the have the image on the left or right. You can choose the vertical alignment to be top, middle, or bottom.
The EJC Badge Block is the Media & Text version.
2022 Erotic Journal Challenge
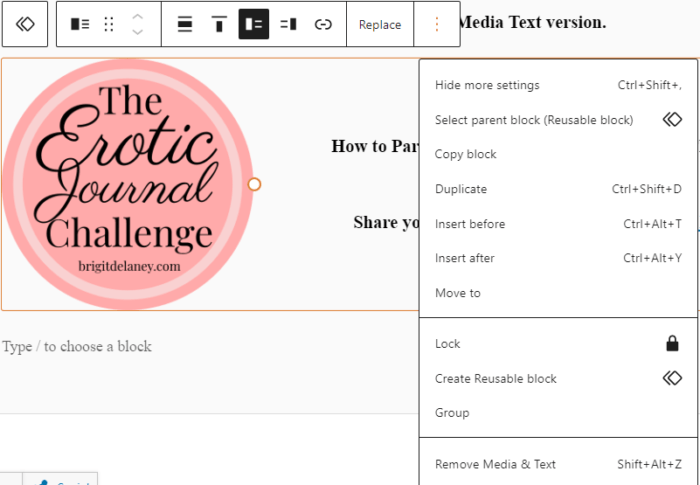
Since these two items are technically in the same block, you can simply select the three-dot menu, then choose “Create Reusable Block” from the options. Name it something easy like I did. I named this one EJC Share Block.
Anytime I type the / key, I can start entering EJC and it’ll pop up in the shortcut menu to add at the bottom of those posts.
Second Method:
I updated the Masturbation Monday Badge recently to simplify. It’s two blocks grouped together. An image and a heading block. Basically, add an Image block (/image) then pick the image you’re using. Add the link to the home page or, if the meme you’re writing for is active, to the page the prompt is on. (This is where things get tricky because you’ll have to change that link each time for active memes.)
Then, create your heading and make it a link to the category page for that meme on your website. Select both blocks, you can do this by clicking and dragging. Once you’ve selected both, you’ll see this menu pop-up:

Then, once you click the interlocking squares, the two selected blocks turn into a Grouped Block. Then, you click the three-dot menu and choose Create Reusable Block. Again, name it something easy. I named this one MMBadge. When I type the / followed by MM, this option pops up in the shortcut menu. This will happen for all of your Reusable Blocks. That’s why I tell you to name them something easy to remember so you don’t have to go searching for them.

Quickie Tip:
When you’re in an active meme, you can still use this reusable block shortcut. However, you’ll want to ungroup the blocks, then change the link on the image, otherwise you may accidentally overwrite all of the others. See below section on templates about ungrouping reusable blocks.
Author Bio Blocks
Now, since I’m technically the only person who writes on this website, I don’t use an author bio block. however, for websites that have multiple authors, such as Story Empire, an author bio block would be an excellent way to have a short bio, with personal website link, and a photo or avatar of the author. I’d recommend using the Media & Text block for them.

Mischa Eliot is an author of consensual, sex-positive erotica and erotic romance. You can find her in Chemical [se]X 2: Just One More (Passion Works Press), Big Book of Submission, Volume 2 (Cleis Press), Cards of Passion Series – Book Three: Stumbling Toward Serenity. Probably spends too much time on Twitter Threads.
☄Author of Erotic Romance😏
⚙Jill of Many Skills💻
🦎Dragon Lady 🐉
🌱Plant Momma🌾
🐺Lover of Wolves💝
💋She/Her🧷
Let’s talk Templates!
When you’re an author who creates books, you want to make it easy to add new book pages, right? So, the best way to do that is to create a reusable block by grouping blocks together that create the page.
Here, we simply used an image block and then heading and paragraph blocks for the details. You can make these fancy when you create the pages to make them stand out distinctly from each other.
If you’re an author who submits to anthologies, you’ll want the title of the anthology followed by the title of your story. Or, you can put it with the other information to the right of where your actual cover image would go. Obviously, you can choose your own alignments for these things. It’s your website, I’m just here to give you a quickie tutorial in how to make things go together faster.
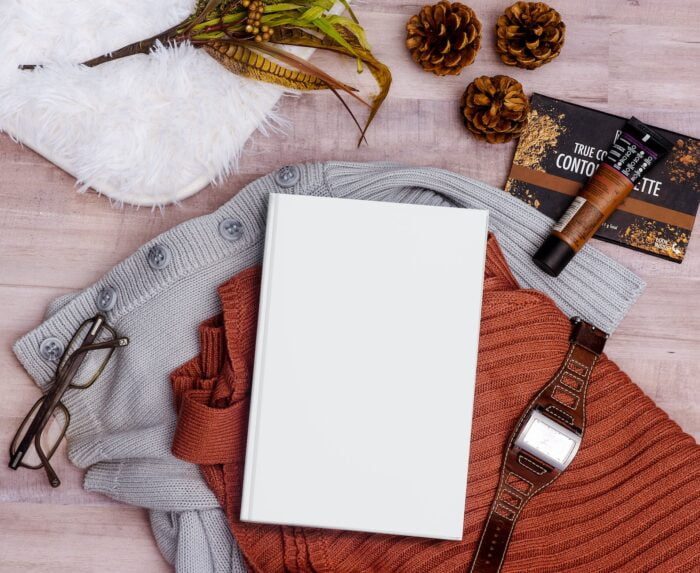
Now, I recommend using a stand-in image like I have here for the template because you’ll be changing it every time you create a new page. Once you’re happy with your Blank Book Template, select all the blocks, then group them together like we did with the MM Badge above. Once that’s done, you can click the three-dot menu and create the reusable block. I named mine BookPageTemplate.
Title Goes Here
Buy
Book Site One | Book Site Two | Book Site Three
Summary
Summary is what goes on the back cover of a paperback and the inside flaps on a hardcover.
Blurb
Blurbs are the nice things people say about your book.
Excerpt
You can include a short excerpt here.
Praise
Praise (or Reviews) of your book.
Quickie Tip
Don’t assume you can’t have more than one book to a page. When I finish writing the series I’m plotting, I’ll create one page for each trilogy. The template can be added more than once. I’d recommend breaking up a long book series, however. That might get a bit much to scroll.
Okay, you have your template grouped and saved as a reusable block – here’s the trick.

When you create your new page and insert the template, you’re going to do something crazy. See the adjoined squares? You’re going to click that and convert the grouped block to regular blocks. This is very important. I even did it for this page. Here’s why.
The reason you want to click that button is so you don’t change your template.
Read that again: You want to convert the grouped block to regular blocks so you don’t change your template.
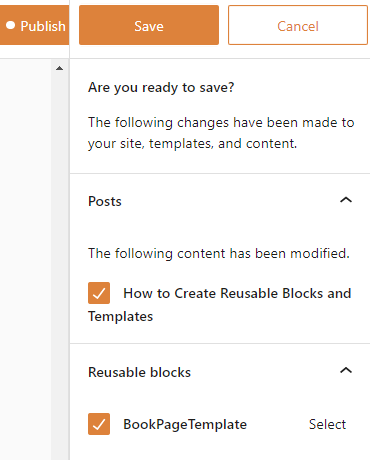
When you make changes to a reusable block, WordPress has this lovely feature under the Publish Menu. Sure, you can unclick the box that includes saving the reusable block that you changed, but trust me, it’s way easier to ungroup them to not have to worry you accidentally changed all of your other book pages when you get rushed or interrupted.
Plus, it’s definitely easier to make minor changes when you update the individual book pages, and again not worry about accidentally changing the template block.
Once you’ve entered all your details about the book, save the page. If you’re in an anthology, you’ll want to wait until the publisher or editor has given the greenlight to share the information, book links are live, etc.
However, if you made changes that make sense to add to your other blocks, like updating the Author Bio Block or Tip Jar, (that won’t change active links) then leave the box marked and publish the page. It’ll update the blocks on the other posts and pages without any extra work from you.
Page Builder Notes
Yes, you can create these pages with a page builder, however you have more block options using Gutenberg these days than with a freebie page builder. So if you have a video trailer for your book, or someone does a review on BookTok, you can also include that in your book page. As you write and publish more, that means more book pages. Look at what other authors have done and use their pages to spur your imagination. Play around and test things out.

If you want to make it look more like a landing page, you can use the Page Options menu (usually located below Yoast SEO depending on how you have your WordPress layout setup) to remove the sidebar.
The first option with the red X is to inherit the current layout you normally use. The second block will remove your sidebars, but keep your header and footer in place.
PS: Don’t be afraid to look at the premade blocks that creators have been putting out there. It’s a little clunky, but you might find something that will help you decide what you want your pages to look like. If you don’t find this option in the bottom menus of your layout, it may be under the Post options on the right-hand side.
Also, I don’t currently use a WordPress Theme that is a Block-Based Theme. I don’t know if the Hueman Theme will be updated to go that route officially, but I do still enjoy the control I have using it and haven’t been inclined to change just yet.
The best way to learn about Blocks and Block-Based themes would be to check out the demonstrations for those themes, how other websites use them, and a deep introduction created by CSS Tricks. And don’t forget, you can also become a maker for WordPress.